March 9, 2026
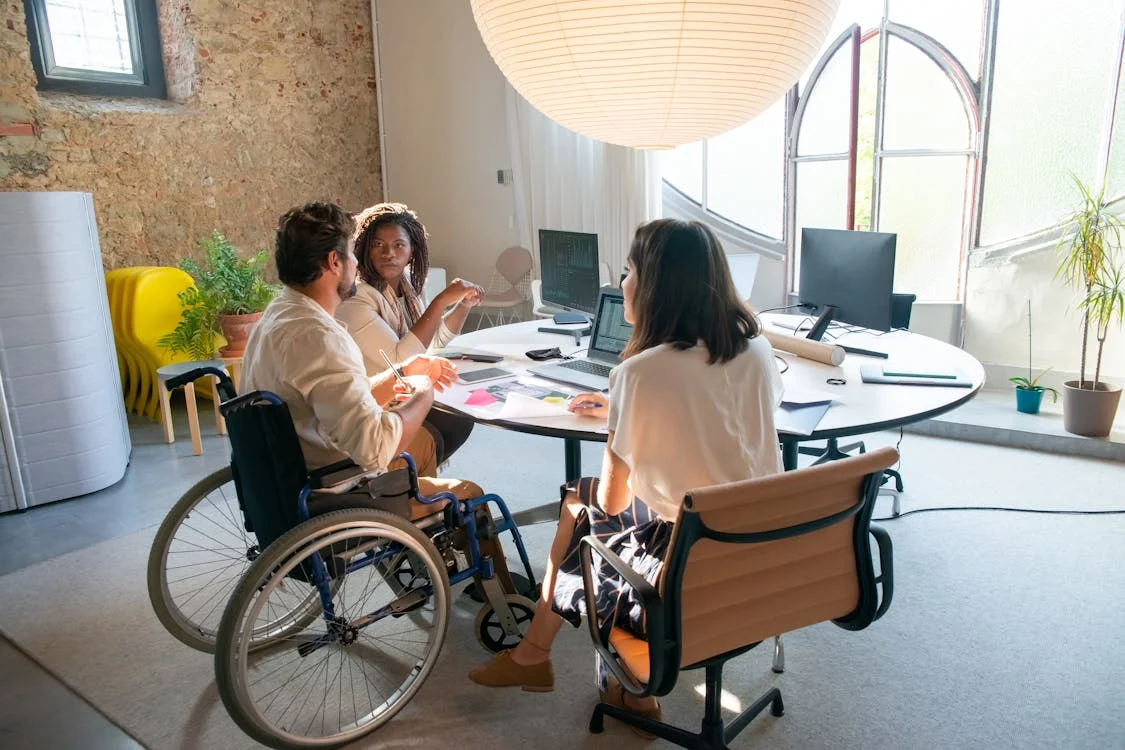
Ever stepped into a swish hotel-style bathroom and thought, “Wow, even grandma could glide through here without a snag”? In Melbourne’s chic apartments and townhouses, accessible bathroom renovations prove you don’t have to sacrifice style for safety.
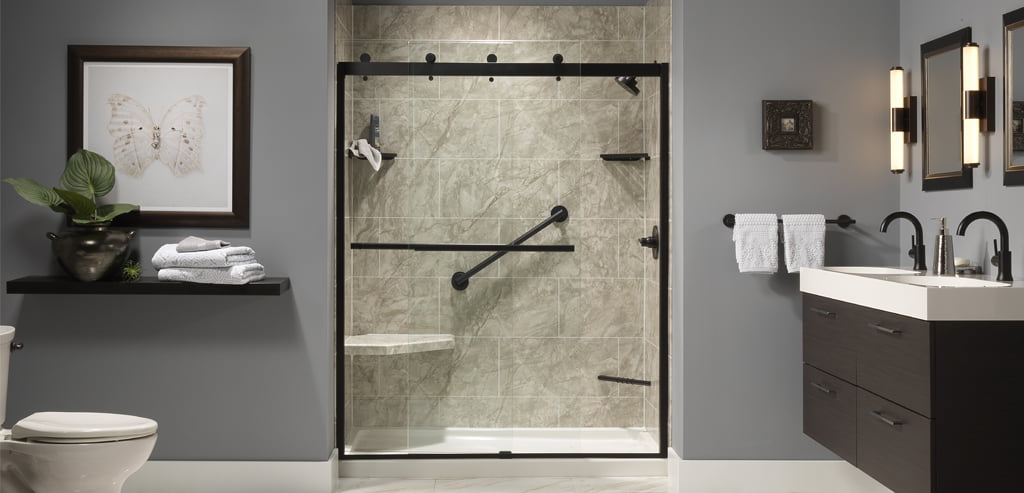
Imagine a walk-in shower so sleek it rivals your favourite spa, complete with matte-black grab rails that double as modern art. That’s right – making your loo user-friendly and mobility-friendly doesn’t mean turning it into an institution.
This guide dives deep into accessible bathroom renovation – from Melbourne price tags to luxe design ideas – with a cheeky dose of wit and GQ-style flair.
Whether you’re future-proofing your home for ageing parents or just love gadgets that give independence a sleek upgrade, we’ve got the dirt (and the rubber duck). First up: Cost breakdown.
We won’t lie: renovating any bathroom can get pricey, and adding accessibility features will bump up the budget. But knowledge is power. A basic accessible makeover in Melbourne – think reconfiguring your shower, adding rails, plus fresh tiles – often starts around $20,000–$25,000.
That jives with industry data: the average Aussie bathroom reno is roughly $26k, and an accessible upgrade adds some premium. For example, a “basic” 4–5m² bathroom renovation (labour + mid-range fixtures) can run about $22,685. In that scenario trade and labour might be around $16,250 and fixtures and fittings about $6,345 (GST included).
Breaking down costs:
Got a tight budget? You might reuse the existing layout or fixtures. Keeping the same shower enclosure/frame can save thousands. But be prepared: tiling, plumbing, and waterproofing are big-ticket line items – high-end tiles or heated floors alone can spike costs. In Melbourne, replacing bathroom flooring often proves a cost driver.
Also keep in mind: various local grants or rebates exist. For seniors or people with disabilities, the Victorian government’s Victorian Aids and Equipment Program (VA&EP) provides subsidies and advice for home modifications, including bathroom upgrades like grab rails, walk-in showers, and non-slip flooring. You can check eligibility and details on the Victorian Aids and Equipment Program page before finalising your renovation budget.
Accessible doesn’t have to scream “hospital.” In fact, think of this reno as a cool mash-up of modern design and user-friendly smarts. Space-saving wizardry and cohesive style are key.
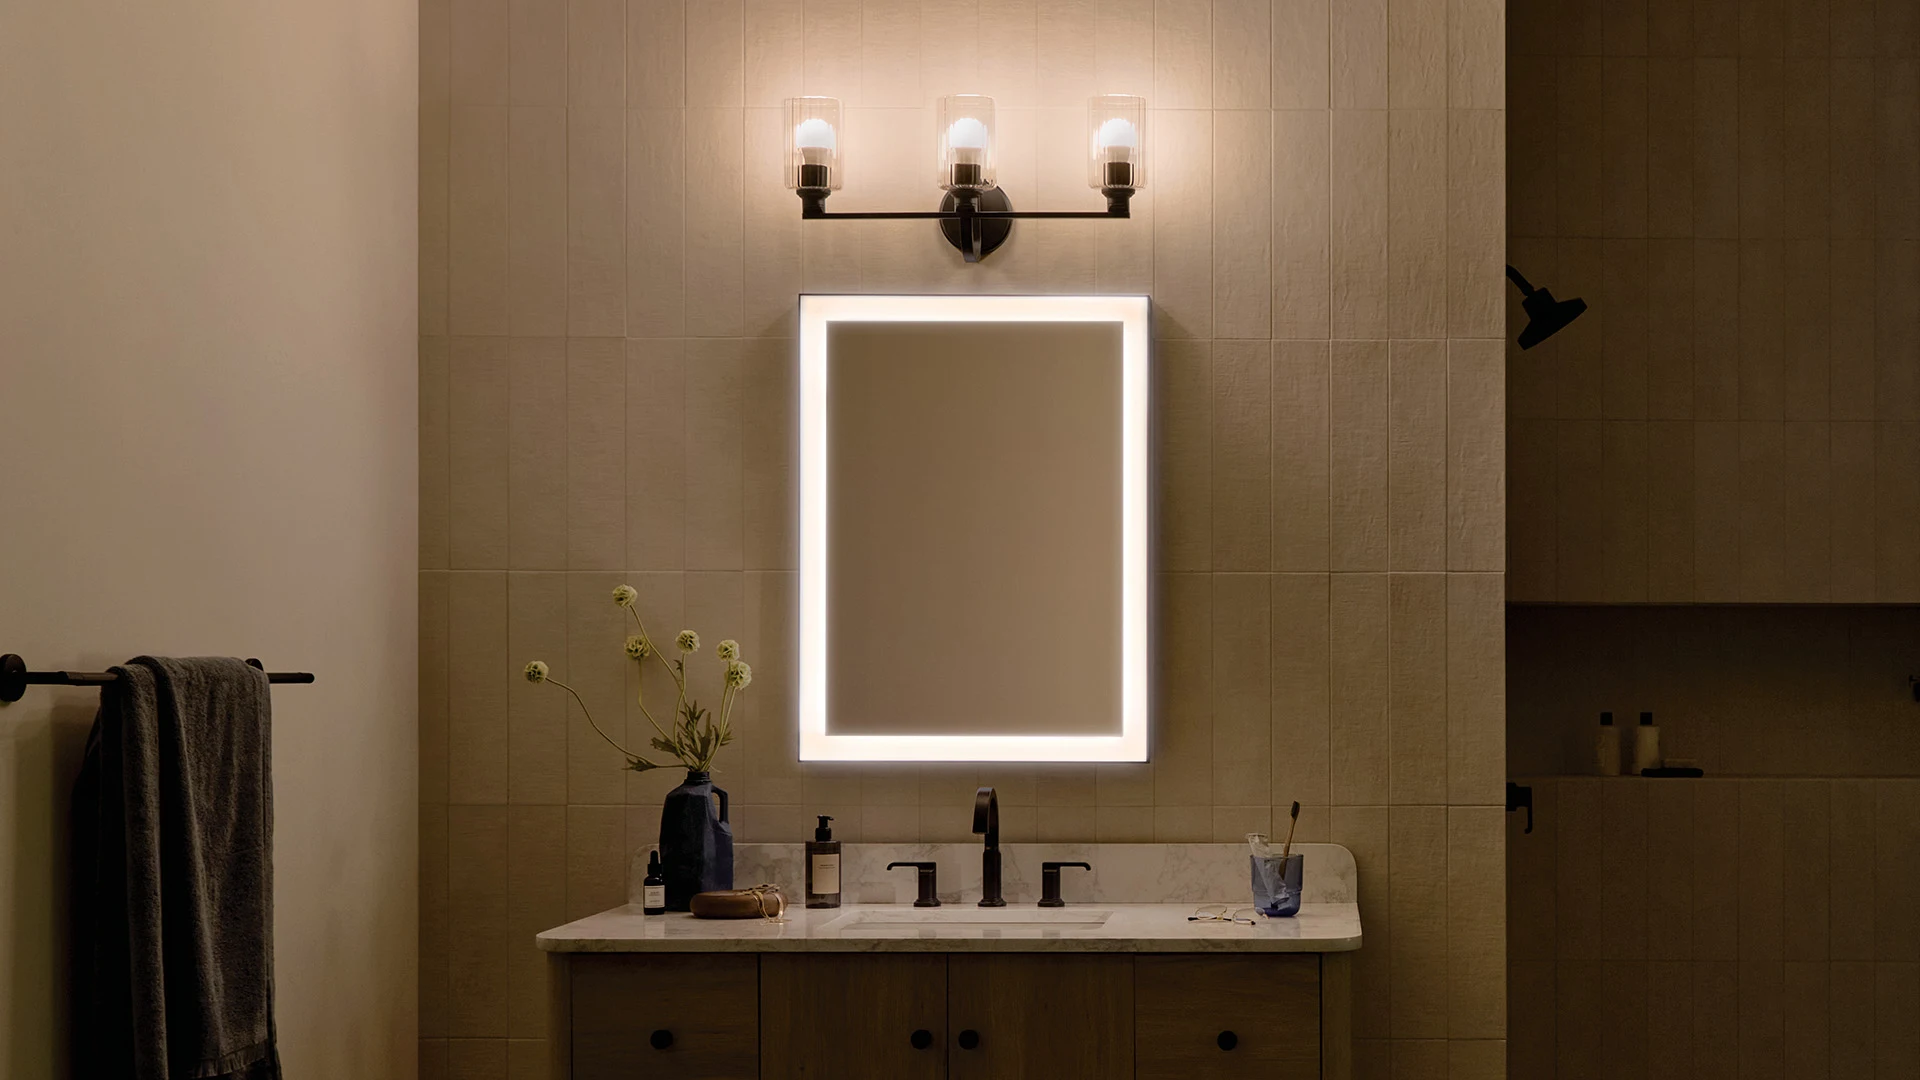
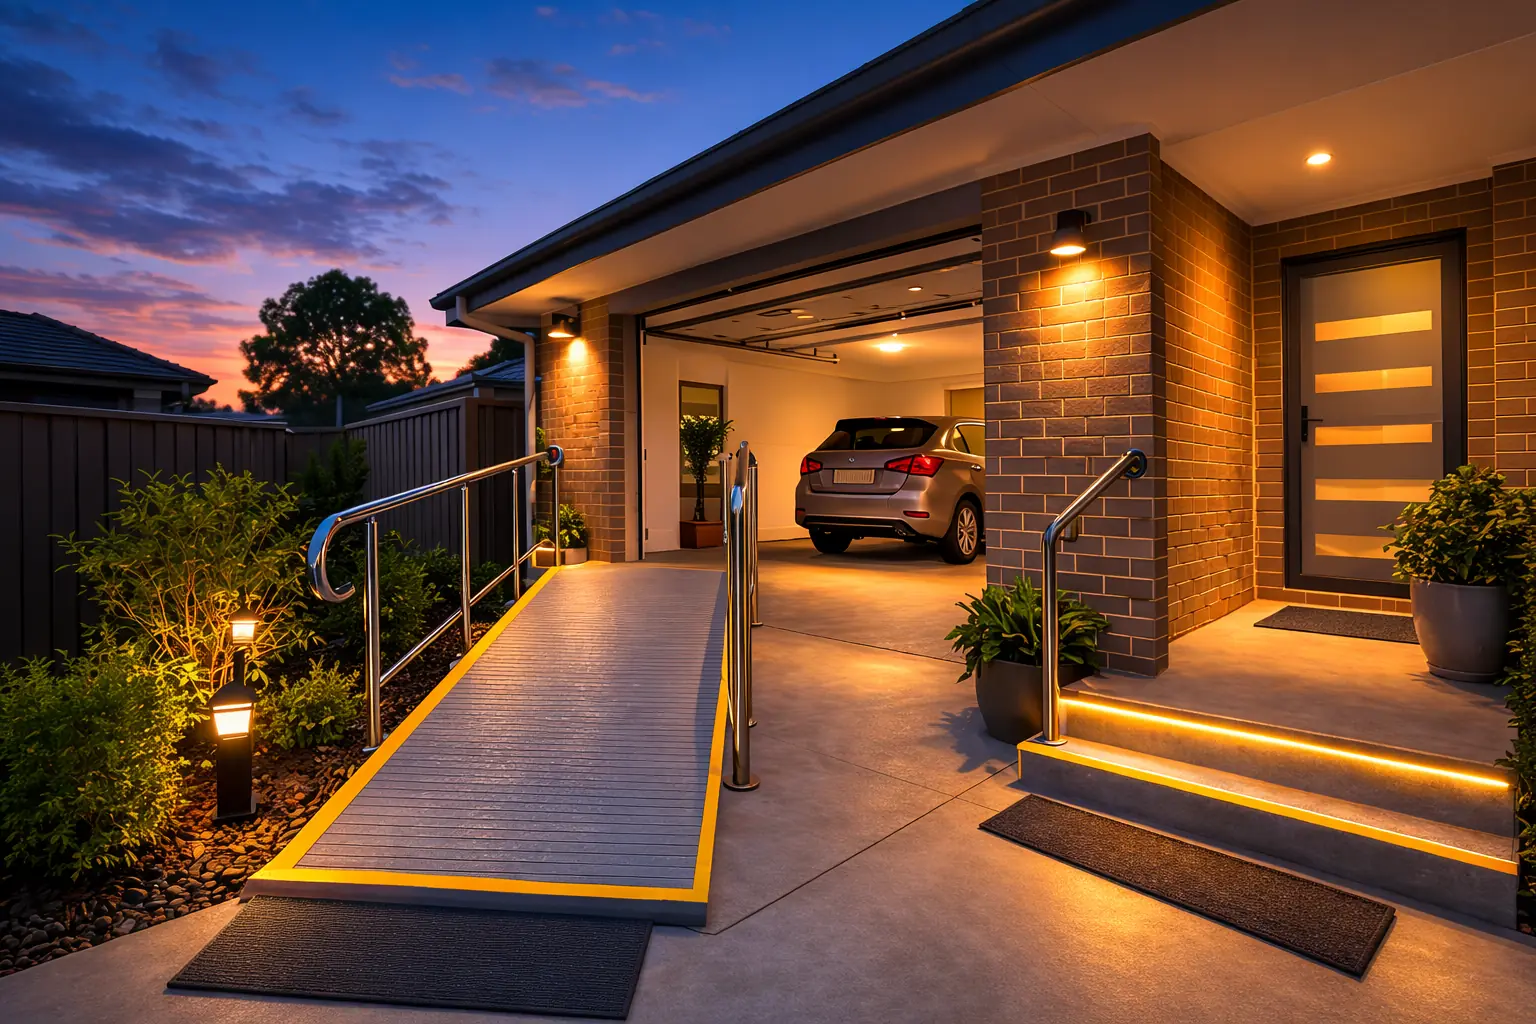
Imagine a seamless, tiled floor flowing from the bathroom into the shower – no lip, no drama. Curbless (also called hobless or level-entry) showers look ultra-modern and let wheelchairs or walkers glide in effortlessly. They also make the room appear larger. Pair that wet room vibe with a sleek frameless glass screen. And for a pop of style, choose grout in a complementary colour to your floor tiles to tie it all together.
Vanities and toilets that hang off the wall free up precious floor space, giving a feeling of airiness and more room to move. They look sharp too – polished stone or wood veneer fronts with hidden fixtures look like something out of an architecture magazine. Plus, you (or a wheelchair) can get closer to the sink. (Just ensure the vanity is set at an accessible height – about 80–85cm from the floor for comfort-height ease.)
Who says safety features must be bland? Matte-black or brushed-nickel grab rails can anchor your palette – for instance, matte black rails with matching tapware and cabinet handles add a geometric sharpness. Warm wooden-look tiles or stone countertops balance that industrial vibe with “welcome home” comfort. Contrast in colours – like a lighter tile floor and darker rails – both helps visibility for some users and keeps the design visually interesting.
Use vertical space. Install tall, recessed medicine cabinets or open shelving above the toilet. The goal is floor clearance, so avoid bulky freestanding cabinets. Even a cleverly placed niche (for shampoos) in the shower wall saves clutter. Think hotel-luxe: everything has its place, with no trip hazards.
Wide light bands (like LED strips under shelves) and large mirror(s) improve visibility. Motion-sensor nightlights are a bonus – no fumbling for switches. As for taps, go levers or touchless models. They look contemporary and people with reduced grip strength find them a breeze.
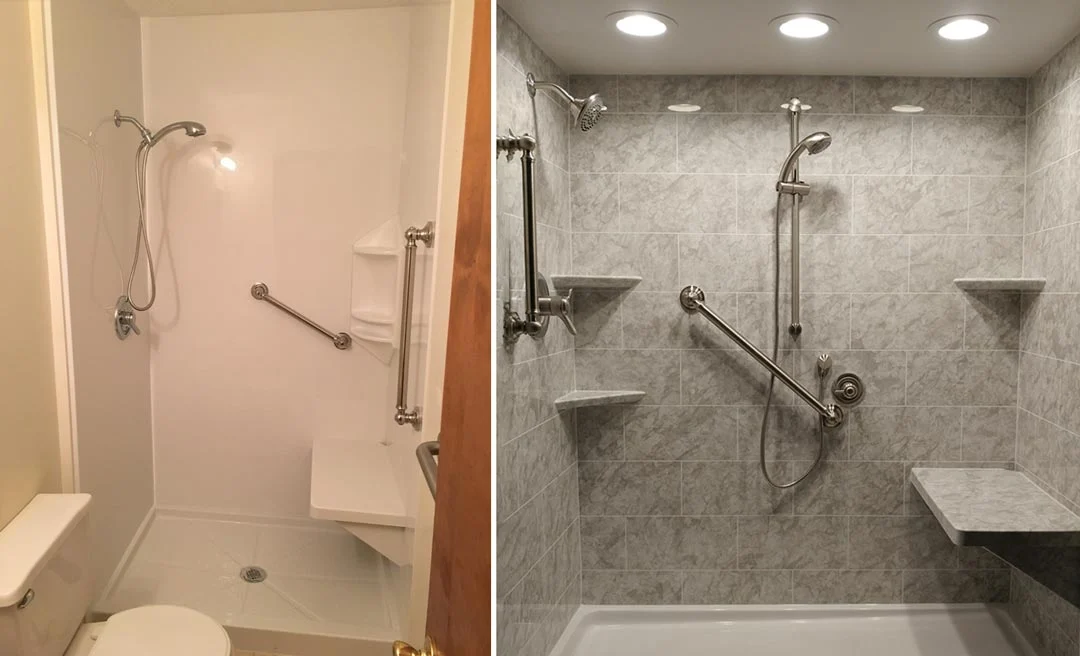
In short, a mobility-friendly bathroom design can be as chic as it is functional. Take advantage of modern materials – textured porcelain tiles for non-slip safety, or vinyl planks that mimic wood (easy on feet and falls). A recent Melbourne reno we saw replaced the usual tiny square tiles with large-format matte tiles, which meant fewer grout lines (easier to clean) and a sleek look. Picture a boutique hotel’s bath, but one where everybody can use the facilities without a struggle.
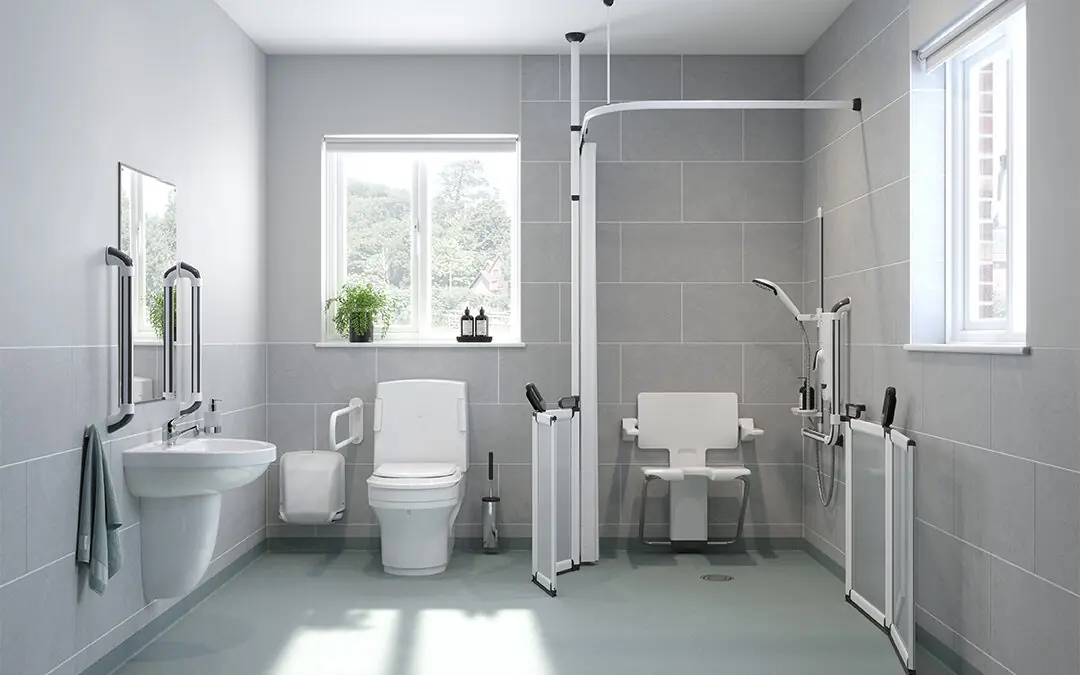
What are the superstar features that make an accessible bathroom truly work? Each one should earn its spot by boosting safety, confidence, and independence:
Each of these features transforms the bathroom from a potential hazard zone into a safe retreat. And with clever design, none of them have to be eyesores. As Cameron Construction notes, planning an accessible bathroom is all about ease of movement – think 820mm-wide doorways, a 1500mm turning circle, and strategically placed rails for every manoeuvre. These elements, working together, mean someone can shower, transfer, and move freely – key to independence.
In Australia, there’s a rulebook (or several) on accessible design – especially for public buildings. For homes, the good news is it’s mostly advice, not law. But following the standards is smart, safe, and can boost your property’s value.
At the core is Australian Standard AS 1428.1 (Design for access and mobility). It lays down the ideal dimensions: doorways at least 820mm clear (a 35cm cane won’t get caught), showers that are “hobless” and step-free, and enough floor space (1200×900mm) in front of toilets for wheelchair access. In simple terms, AS 1428.1 says “give people room to move and things where hands can reach.” For instance, it specifies grab-rail height (around 80cm above the floor) and toilet pan clearances.
The National Construction Code (NCC) and Livable Housing Design Guidelines also speak to this. The NCC isn’t mandatory for an existing home renovation, but it does endorse the Livable Housing Standard (the Silver level of these guidelines, now in the 2022 update) – which requires at least one step-free shower and reinforced walls for future rails. In practice, that means if you’re planning a hobless shower, you should waterproof it thoroughly to avoid leaks (AS 3740 specifies this), and consider building extra stud support behind walls where grab bars might go later (so they won’t tear out).
For Melbourne DIYers, also think about local council rules: if you’re moving walls or plumbing, you might need a permit. Always use licensed tradespeople for electrical and plumbing work – not just for safety, but for insurance (and to satisfy consumer protection laws).
Finally, an important legal note: Disability Discrimination Act 1992 encourages accessibility, but it usually applies to public spaces and rented properties. If you’re renovating a private home, you’re not legally forced to meet AS 1428.1, but why not? It’s like having built-in retirement planning. Melbourne’s architects often stress that an accessible bathroom “future-proofs” your home. Plus, if you ever sell, a certified accessible feature list (with compliance) can broaden your buyer pool.
Follow the standards as much as your budget allows. Always prioritize safety dimensions (clearances, rail heights, non-slip surfaces). They’re there to prevent mishaps – and really, who wants to slip, trip, or struggle at home?
| Feature | Approx. Extra Cost (AUD) | Notes |
|---|---|---|
| Grab rail (wall-mounted) | $150 – $300 each | Depends on style and install. Sets of 2–3 rails ~ $500–$900. |
| Fold-down shower seat | $100 – $300 | Hinged seat with waterproof padding. |
| Non-slip floor treatment | +$100 – $200 per m² | Textured tiles or applied coating (over tiling). |
| Comfort-height toilet | +$300 – $600 | Taller seat height (no change to bathroom layout). |
| Walk-in (curbless) shower | $3,000 – $8,000+ | Includes removing any curb/tub & leveling floor. |
| Lever-style tapware | +$50 – $150 each | Easier to operate; matches modern style. |
| Widen doorway (+150mm) | $200 – $800 | Depends on wall type; improves wheelchair access. |
| Emergency pull-cord/alarm | $200 – $500 | Optional, for peace of mind in a private home. |
This table gives ballpark figures – actual quotes will vary. Remember, some of these upgrades (like a ramped shower floor) might already be partly covered in your main renovation estimate, while stand-alone fixtures (like grab bars) can often be added later.
Costs typically start around $20,000–$25,000 for a small bathroom with basic accessibility features, and can reach $40,000+ for premium finishes or major layout changes.
Yes. Adding grab rails, a hand-held shower, non-slip mats, and a shower seat can improve accessibility without tearing out the entire bathroom.
Not at all. In fact, well-designed accessible bathrooms can be a selling point, especially for buyers looking for future-proof or multigenerational homes.
Minor upgrades can take 1–2 weeks, while a complete renovation with layout changes may take 3–6 weeks depending on design complexity and trades availability.
Ready to remodel your bathroom into an accessible oasis? With the right planning (and perhaps a dash of Pinterest inspo), you can achieve a mobility-friendly bathroom design that’s both safe and stunning. Time to reach out to a designer or builder and start drafting those plans – the perfect blend of comfort and style awaits.
Don’t let myths about cost or design hold you back: an accessible bathroom renovation can be a smart, value-adding upgrade. Contact a renovator or occupational therapist today to see how your dream can become reality!